Tutorials

Lost Art of the Letter

Lost Art of the Letter

In this virtual “correspondence course of correspondence” we’ll look at ways to embellish letters and envelopes with original art and collage pieces, discuss formats for writing personal letters that make them sincere and whimsical. Along the way you’ll have handouts to print, cut and color, links to great letters through history, resources for crafting stationary and art, recommended books to order from local shops still doing mail order and a host of places to send thank you notes and other letter exchanges.

Cool projects from Beer Crafts Fans

Beer advent calender directions

With the holidays coming up its super awesome to see some of the great gift ideas coming together around our favorite craft supply, beer!  I've been getting some great mail lately and seeing other cool gift ideas on the web and am delighted to share photos and projects.  Tim and Devon at Penny's Pints Pittsburgh made this absolutely kick ass beer advent calender .  I love the PVC pipe idea which means I could use it from one year to the next OR every month!  Seriously, why just once a year?  It's a great design and they did a fab job on the instructions, kudos boys!

Beer cards from thebeergeek

Merideth at beergeek.com is a true Renaissance woman, traveler, writer, lover of all things beer- she's sent me some very fab photos of her own creations including these rad cards from empty six pack boxes.

geneva's embossed ornaments

One of my favorite holiday crafts came from Geneva in TN, we met at a book signing this summer in Colorado and she told me about her embossed ornaments.  Such a great idea and who wouldn't want Kenny and Cartman around to make the season just a bit more festive.  I don't quite know how she made the coolness, BUT I've suspicions- expect an embossing tutorial in the near future. AND if you're looking for other great ways to celebrate the season- check out the beer menorah contest on the Schmaltz brewing facebook page, it's a delight and one of the best beers on the planet!

As a holiday gift to you, beer friends- I'm running a discount in my ETSY shop on signed Beer Crafts book, for folks who follow the blog.  Enter HOLIDAYBEERS at check out for $2 off your purchase. Feliz Navidad!

Beer Can Bunting

beer can bunting tutorial www.beer-crafts.com

If you've been anywhere near Pintarest lately or perused a craft magazine you'd know the world is positively festooned with colorful bunting, long streamers and cute decorative pennants and flags. Inexpensive to make and high on the "wow" factor,  paper garlands are popping up everywhere, and like so many other great projects, I knew I needed to put a Beer Crafts spin on them.

beer can bunting at the New Belgium brewery in Ft. Collins

My bunting is designed a super simple crochet pattern, the same that fab fiber artist Bekki Scotto used for making the hats in the Beer Crafts book, and in terms of party decor it's as cheap as it comes- empty beer cans and yarn from my stash.  The only supplies you'll need are pair of scissors, hole punch and a crochet needle.  A six pack (or two) later and your back porch is gonna look styilin- Best part about this craft, aside from the tasty beers you'll try on your way to making it... is it's portability, the banners pack small and if you're using a forgiving yarn, you can leave them out overnight.  I've had a blast this summer traveling to some outstanding bookstores and breweries and my bunting has decorated all the festivities getting just a little bit longer with each stop.

This Saturday, August 24th  I'll land in Cincinnati for even more crafty fun at the Christian Moerline Tap Room, and  Cincinnati Arts Center and Arnold's Bar on the 26th, you'll know me when you see me, I'll be the girl with a beer in one hand and bunting in the other- and say, beer can bunting looks perfect for yarn bombing... maybe some of my extra fun Cincy pals will want to join in that fun too!  Looking forward to crafting it up with some fine local beers- I know there will be some MadTree Brewing cans getting added to the chain for sure.

Beer Can Bunting DIY tutorial #shasta #vintagetrailer www.beer-crafts.com

Below are my directions for making bunting and if you're ANYWHERE near Humbolt county this Wed. you absolutely must go meet Bekki and the kids at SCRAP- they'll be having a fab evening of making, and of course THERE WILL BE BEER.

If you're new to crochet there are some pretty great tutorials on youtube this one has a whole bunch of stitches in one video

Supplies:

can opener

size H (5mm) crochet hook

paper hole punch

scissors

one skein worsted weight yarn or medium weight scrap yarn from stash

beer can

How to: 

1. Crack open your favorite can of beer and empty it (my favorite method for this is pouring it into my mouth). Rinse can with water and let dry.

2.  Pry off pull tab and save for another craft project

3. Using a can opener on the OUTSIDE of your lid remove the top to your can.

how to cut a can for bunting www.beer-crafts.com

4. With your scissors cut down the length of your can through the UPC label area

5. Cut your can horizontally to remove the bottom and trim off top beveled rim of can too so you are left with a flat panel, this is your flag- many beers have two images on the can and you can cut this in half or maybe you want a long wide flag... I've also cut some into long triangle pennant shapes, there's no wrong way to shape this.  You will want to round all your corners off slightly so the edges don't poke through your crochet work

6. With your hole punch make holes around your can about 1/4 inch from the edge, make sure you have holes in each corner and spread the rest in between about an inch apart.

7. Using your crochet hook sl st into your top right corner hole of can panel and ch3 (counts as 1 dc), dc 2 into the same hole, dc into the next hole and all following holes until you get to the next corner, dc 5 into the left corner and repeat your work around the can, working 3 dc into holes along straight edge and 5 dc into corners until you arrive back at the start.  Work 2 more dc into the starting corner, sl st into the second ch of the ch 3 and tie off.

8. Make as many of the flags as you'd like, go nuts, use up all your old yarn, go try some fancy new beers, you'll probably want about a dozen flags to kick this off, but it's really up to you

9. To connect the flags you'll be making a big long crochet chain- you can work these in a larger needle if you'd like and even even work on a bulkier yarn. I wanted to make sure I had a nice long tail to tie each end off with so I chain stitched about 18 inches then worked my chain across the top stitches of the flags spacing the flags about 18 inches apart.  I knew I wanted to make my flags cover some big distance so they are fairly well spaced, they'd look pretty darn cute if you spaced them closer together too.

I'd love to see how your bunting comes out, send pics and I'll post them on the blog.

Make a Father's Day Beer Trophy

Beer Can Trophy www.beer-crafts.com

Three cheers for the guy who brought you into this world.  Raise a can to salute the man who taught you all about belching, belly scratching and the importance of keeping a couple frosty ones in the fridge.  Is there any better way to salute a guy than with an awesome trophy of his favorite brand? I think not! Beer can awards are ridiculously easy to make- you'll need an old trophy, get that at the thrift store, don't use one of his, that might not go over too well! You'll also need 2-3 empty cans or a six pack if you're making an epic tower and glue sticks and a glue gun. You might look too for extra parts to embellish the trophy.  A small urn turned upside-down makes a great pedestal and  tiny beer cans from doll house sets look good in trophy statue hands.  I like to combine parts from different trophies to get extra height and bling.

To Make:

Step One: Open a beer, Dad's favorite brand.  My pop drinks Heineken, so I decided to make him a trophy using Iron City instead because the can was pretty freakin cool. I washed out the can after I finished it off and set it upside down to dry, afterward I pried off the pull tab using my fingers.

Step Two: Deconstruct the trophy.  There is probably a small nut at the base which needs to be unscrewed.  The nut is most likely attached to a rod that goes through the entire trophy.  Pull this out and save it for another project then go ahead and take the other pieces apart.

Hipster Trophy details

Step Three:  Re-assemble trophy.  Another easy peasy thing, find the parts you like best and stack them up gluing each layer with a glue gun.  This is the fastest method for putting it together but not super durable so you'll want to be careful carrying it around.  You can try another glue for stronger bond, like Gorilla Glue, and you can fill your cans with sand to make them more stable BUT your trophy will get super heavy that way and can make a huge mess if it comes apart- Personally I stick just with the glue gun but there is lots of room for experimentation with this craft.

You can add caps to this too or go all out and have a fresh engraving made for the base letting dad know he's #1 in your book!

Pin One On

Magic Hat Pincushion www.beer-crafts.com

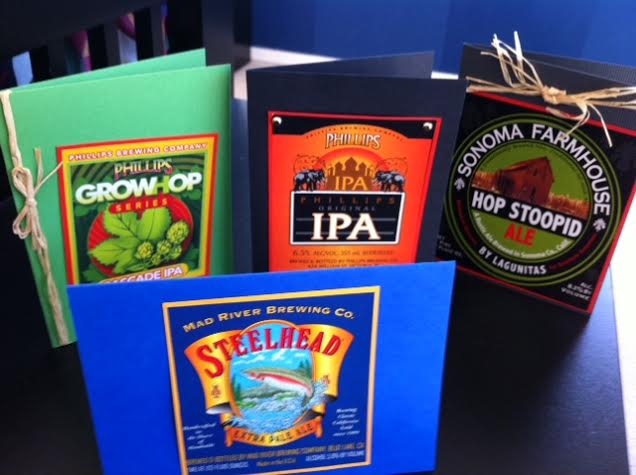
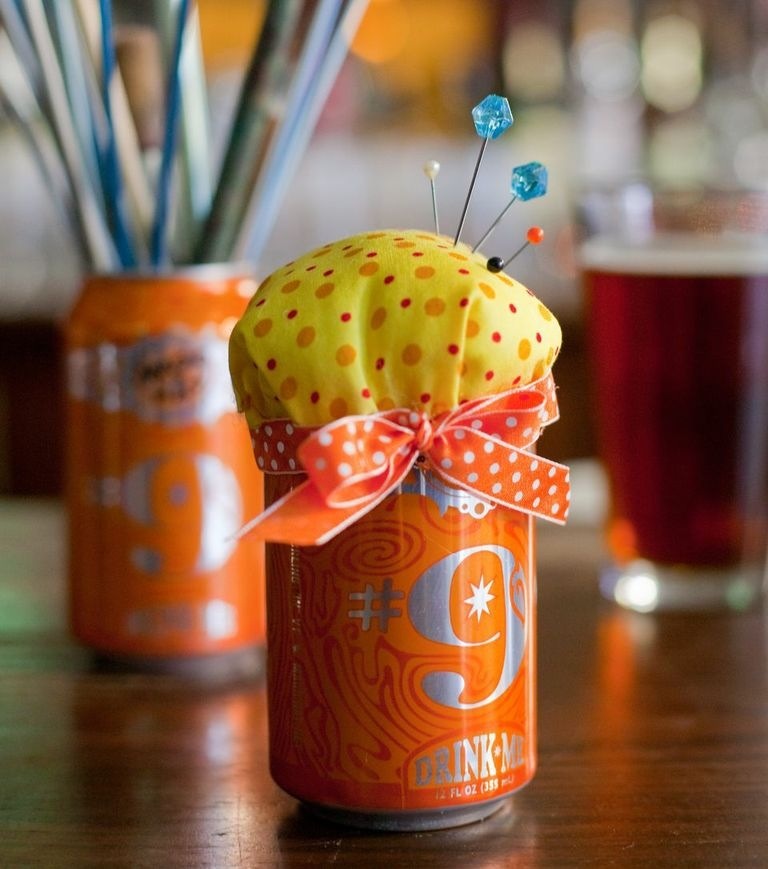
With Mother's Day just around the corner, I wanted to put up an easy and fun gift tutorial from my new book which is entirely practical and features Mom's favorite beer. If your mom is anything like me, there are probably a couple cool looking cans sitting in her recycling bin right now just waiting to be upcycled.  If not, you should go pick up her brand of choice and pour her a cold one.  You could drink this beer yourself, but remember, this is the woman who gave you life, carried you around for nine month, wiped your runny nose, made sure you were wearing sensible shoes and gave you your good looks.  Seriously, you should buy her a beer.

Once you've drained the can, it's time to get crafting. The following are a list of supplies you'll need to complete the craft:

Supplies:

Beer can

Can opener

1 cup small rocks

Small amount stuffing or fiberfill (enough to fill the can, plus a generous handful)

Scissors

8 x 8-inch piece of fabric

Hot glue gun

12 inches of any width grosgrain ribbon, for trim

Rickrack, buttons, or sequins for embellishing

How To:

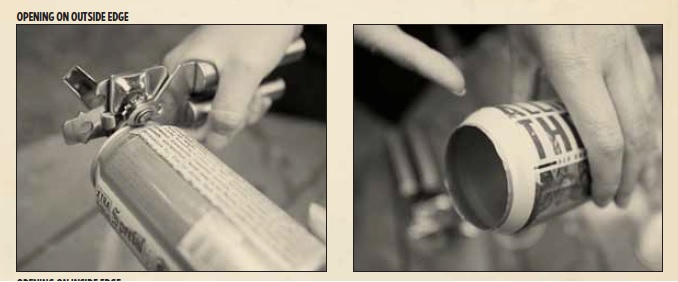
Open up the can of beer and drain it quickly.

Pry off pull tab and save for another project

Use the can opener to remove the top from the can. Rinse and dry the can, being mindful of the cut edges.

Fill the can about halfway with small rocks.

Fill the remainder of the can with stuffing, leaving about 2 inches of stuffing coming out of the top of the can. Set aside an extra handful of stuffing for the last step.

Cut a 7-inch circle from the fabric.

Cut 1/2-inch slits in fabric every inch all the way around the fabric circle.

Hot glue the edge of the fabric to the outside of the can. The slits you cut will help ease the fabric tension, but you’ll also want to let the fabric fold onto itself in creases as you glue it down.

stuffing a beer can pincushion www.beer-crafts.com

When you get halfway around the can, insert the rest of the stuffing.

Finish gluing the fabric around the can.

Put a bead of hot glue around the seam where the fabric meets the can, then place the ribbon on top of the glue beads.

Embellish the pincushion ribbon with rickrack, buttons, or sequins

For 39 other cool crafts like this, check out my new book Beer Crafts available now for pre-order and on the shelves May 14th.